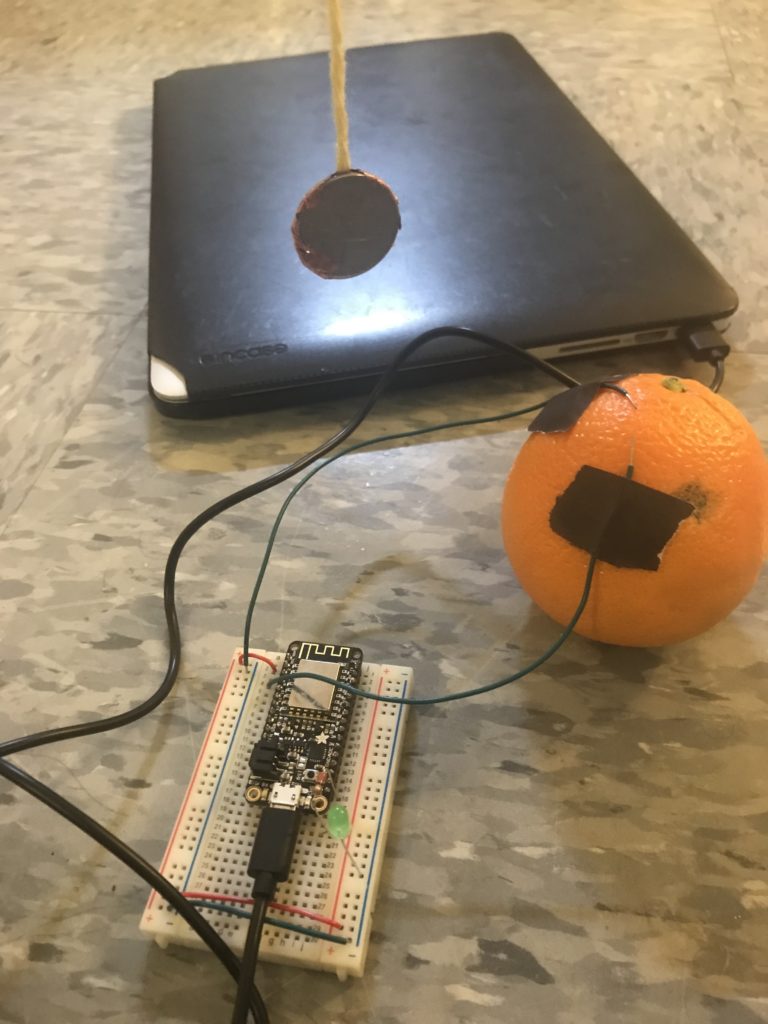
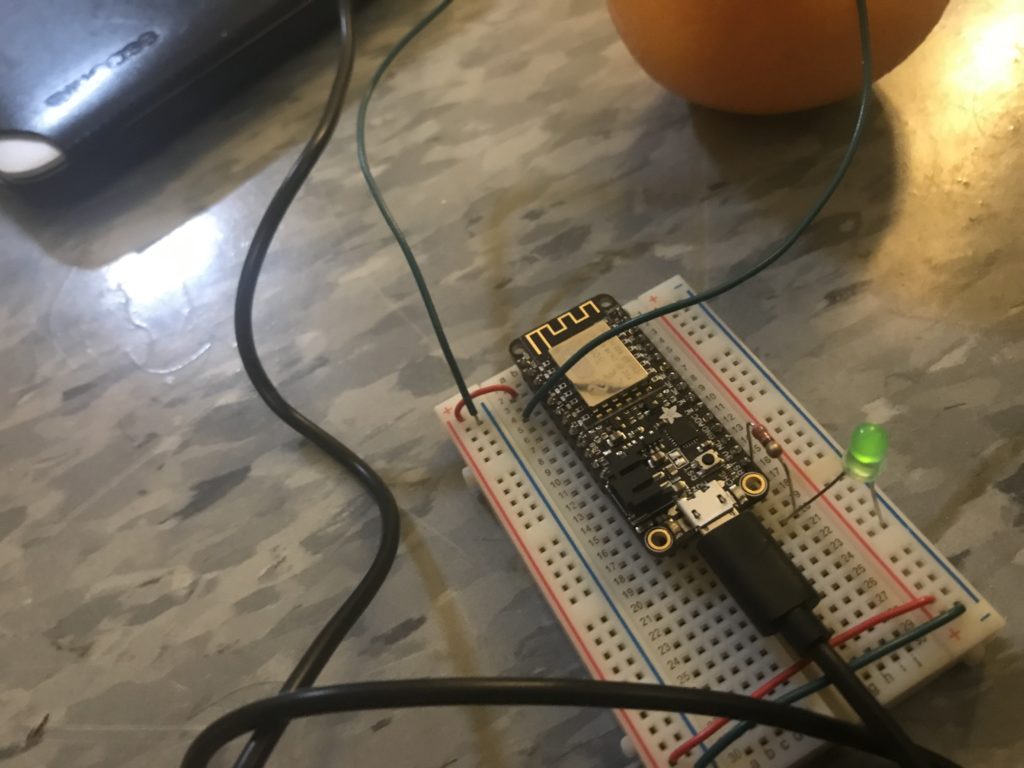
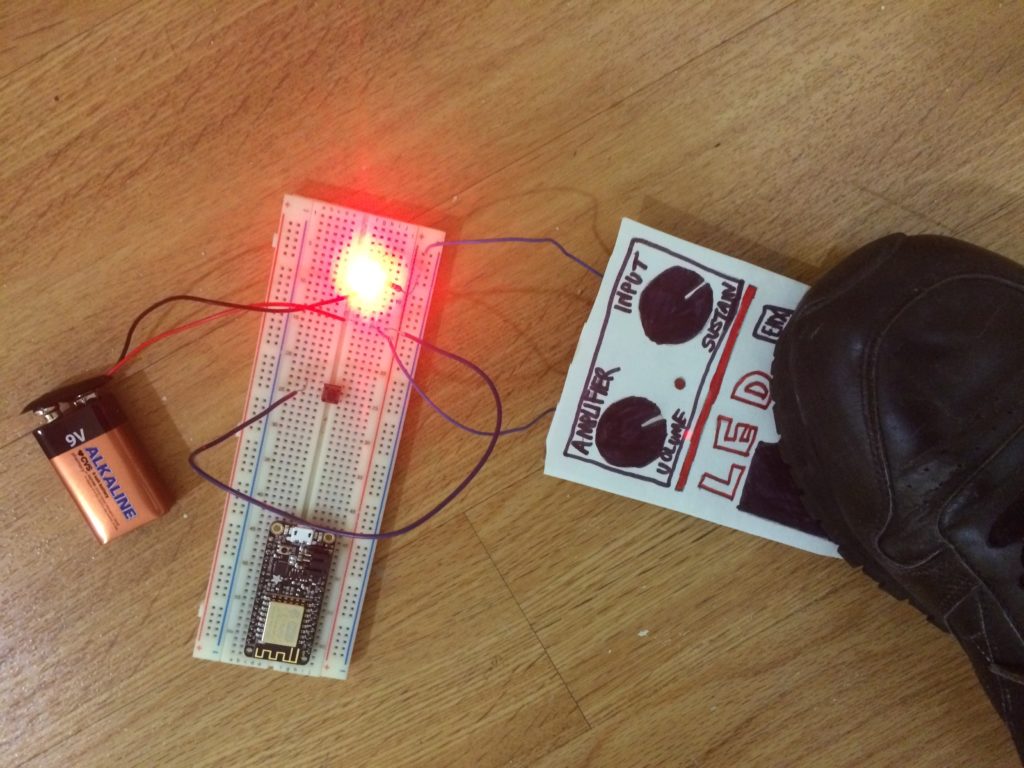
In belated accordance with our recent homework assignment, I connected my forward lumbar stretch switch to the Feather microcontroller and used a standard blinking function to direct the LED. The suspended quarter could be lowered down and onto two exposed wires that then created a connection between the microcontroller’s output and the LED.
It mostly worked! I repeatedly ran into a problem though: the LED was always quite dim when it blinked on. All the wires were extremely flush the first time I arranged the breadboard, so my first theory was that I hadn’t cut long enough wires and that the exposed ends hadn’t then been pushed all the way in. So I recut the wires, arranged them all, and nothing changed.
I then went into Arduino and realized I was directing the microcontroller toward the wrong pin, so I changed the LED integer to 16 rather than 2. That got the LED blinking at a brighter intensity, but it still wasn’t bright bright, and I’m not sure why. Nevertheless, the quarter switch worked, and I feel younger and more flexible than ever before.
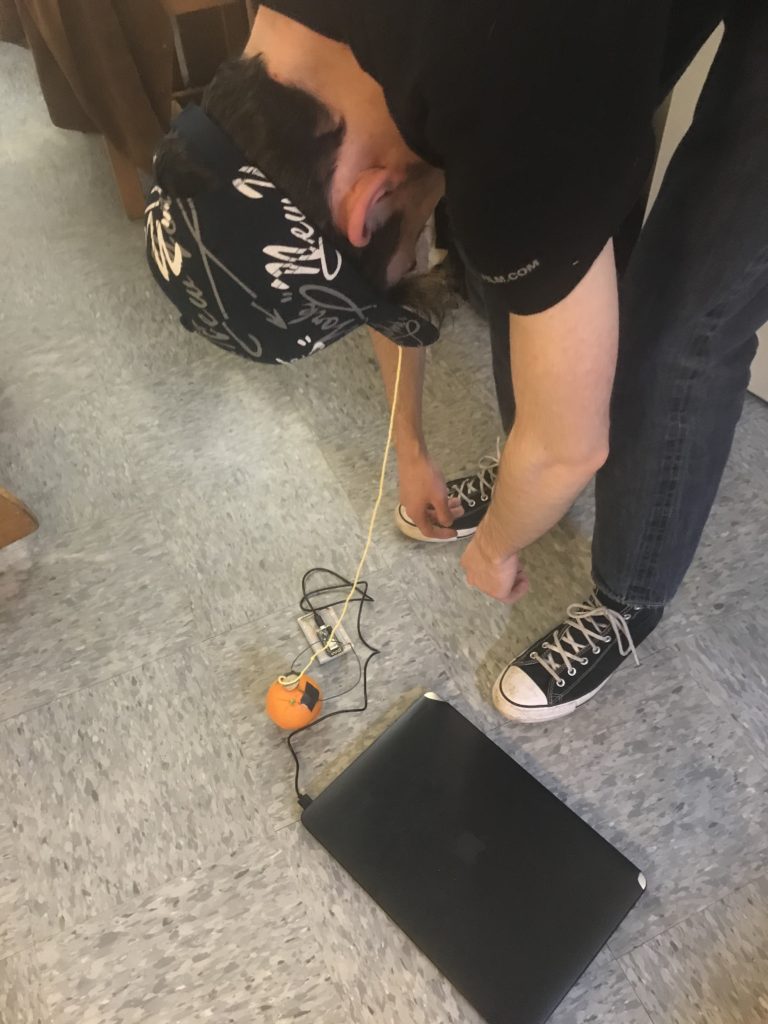
Regarding potential improvements, it’s a little grotesquely DIY, particularly the exposed wires that are effectively taped to the side of the orange. I’d also like to figure out what happened with the dim LED light.
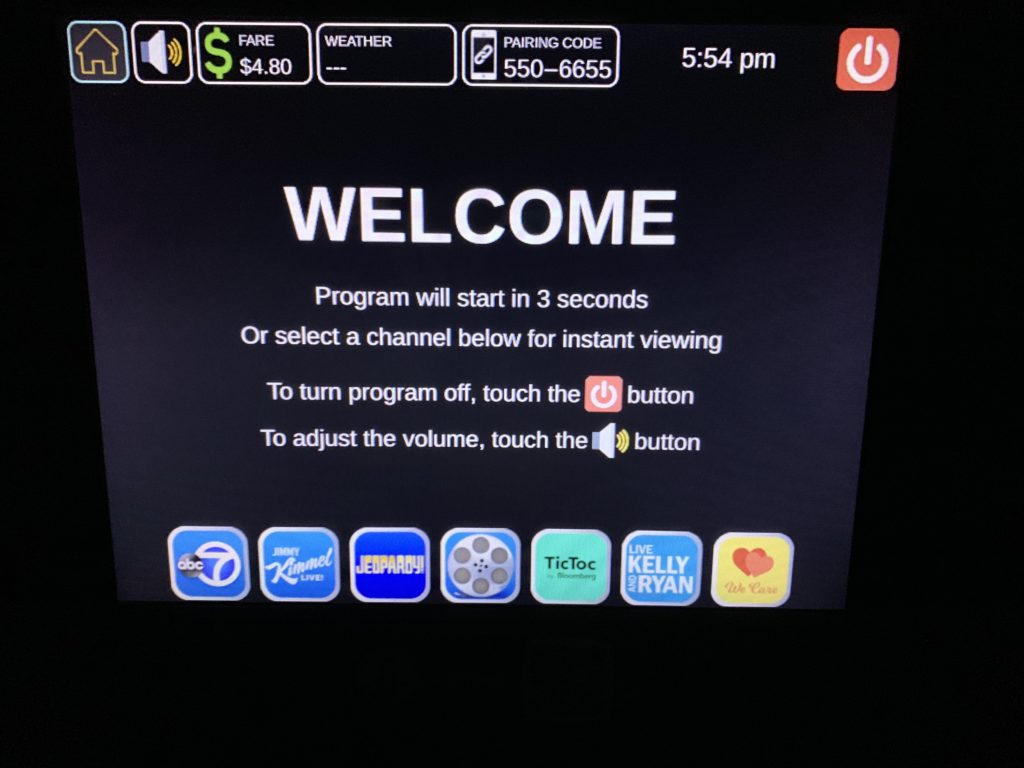
I was waiting in line at McDonald’s for a coke. The McDonald’s in Union Square has kiosks to order off of, because they don’t always have cashiers to make the transactions. The person in front of me (and I when it was my turn) had trouble ordering off of the kiosk.
The most frustrating thing about the kiosk is, there’s absolutely no affordances when you tap something. Normally when you have an interface or an object you know it’s being tapped because it highlights the portion that has been tapped or has a loading indicator. The person was trying to order some McNuggets but when they tapped on the menu item nothing had occurred. This quickly led to the person trying all sorts of different ways of jabbing their finger into the screen as hard as they could. The lack of knowing what the kiosk is doing here is the real problem because we expect when we touch something, it reacts to us. After the kiosk had finally picked up the person’s tap, it didn’t choose the right menu item. That process was started again when they were trying to hit the cancel button and go back.
When you usually go through interacting with a touchscreen or an object, we need to know that the object has taken, accepted our input and is doing something with it. It had no signifiers and when it actually did they were delayed. When they went to pay at the kiosk, there was nothing telling the person to use the terminal to pay with their card. Just “pay here” was posted with all of the payment options. I thought it was particularly interesting because this is supposed to take less time than a cashier and yet I couldn’t help but think I might’ve already ordered by the time this actually finished. My ideas to improve the kiosk would make it more responsive and if it’s not recognizing a tap on a button at least put a dot to indicate where the person tapped, so they can tap more precisely if that’s the issue. People need to know what the kiosk is doing when they’re trying to order their food.
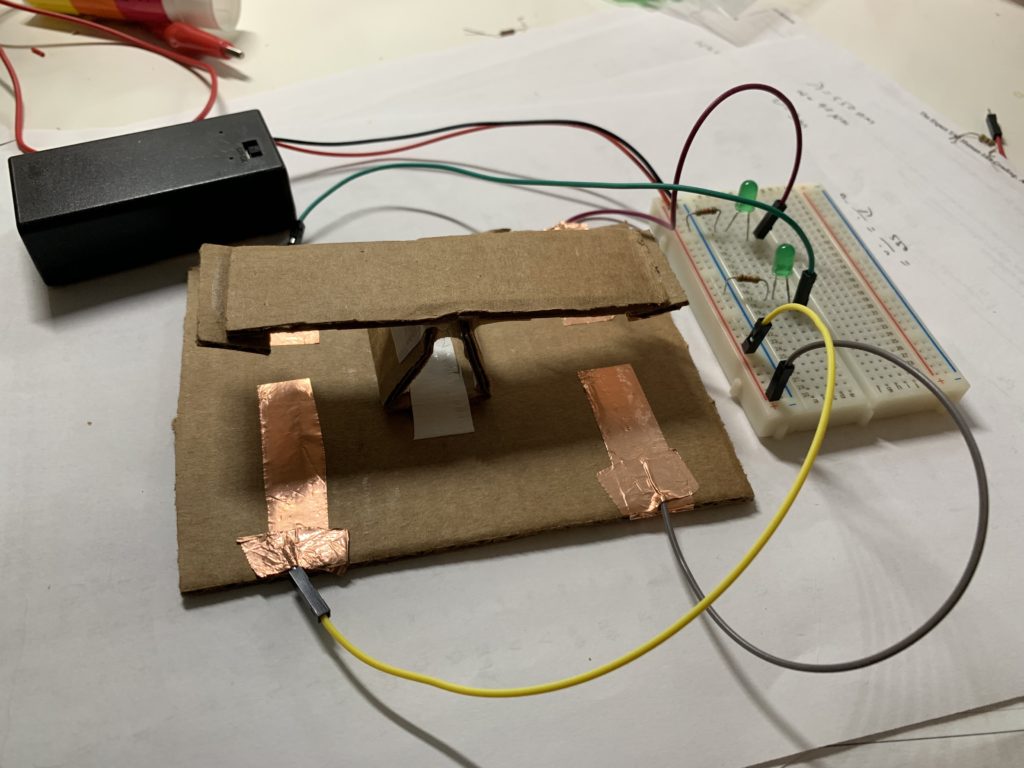
The original idea comes from using the body weight to turn on the switch and make it as a game for friends and families. Then I realized I can’t make it that large, so I made a smaller version of the seesaw switch.
So it is basically a seesaw in the middle. When one side of it reaches the ground, it will complete the circuit and turn on the light.
For the next step with our hands free switches we have been tasked with connecting them to our Feather HUZZAH micro controllers and getting them to function appropriately as a switch.
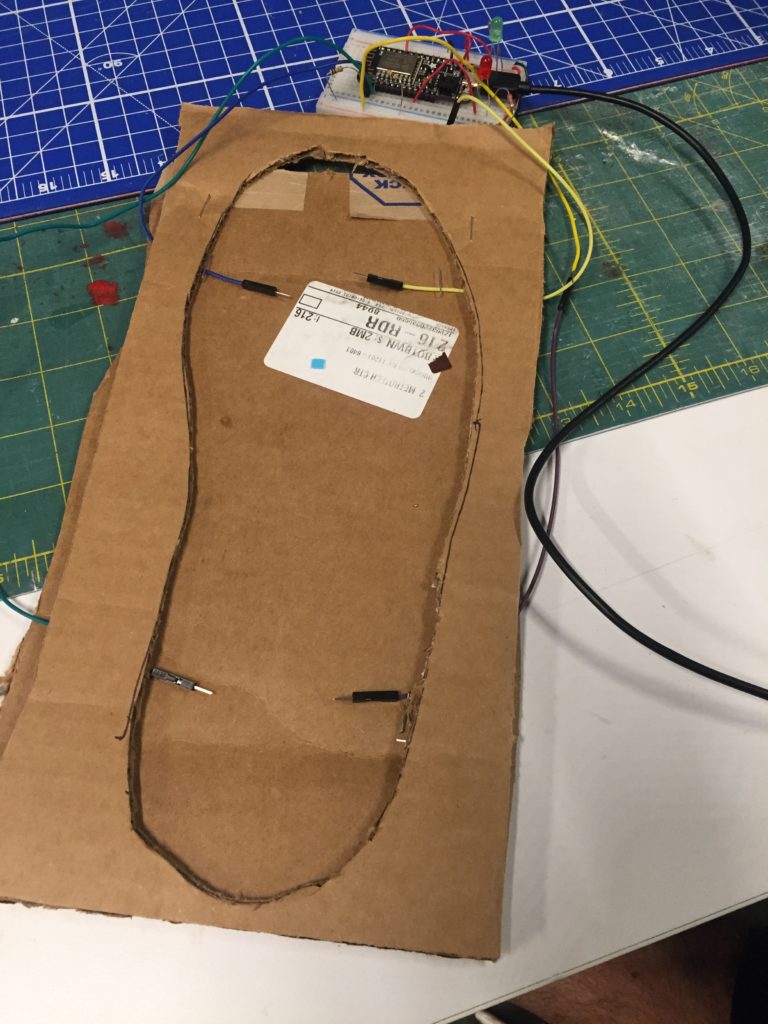
I had three options with my foot switch because it had two independent switches built into one interface. I could either do a switch in series which would mean one would need to bride both connections to get an LED to turn on, I could do a switch in parallel which would allow both switches to trigger the same LED but connecting both would do nothing extra, or I could just use them as two separate switches. I opted for the last option because it is easier for debugging and makes for a more fun demo.
Materials:
breadboard
LED x 2
wires
solder
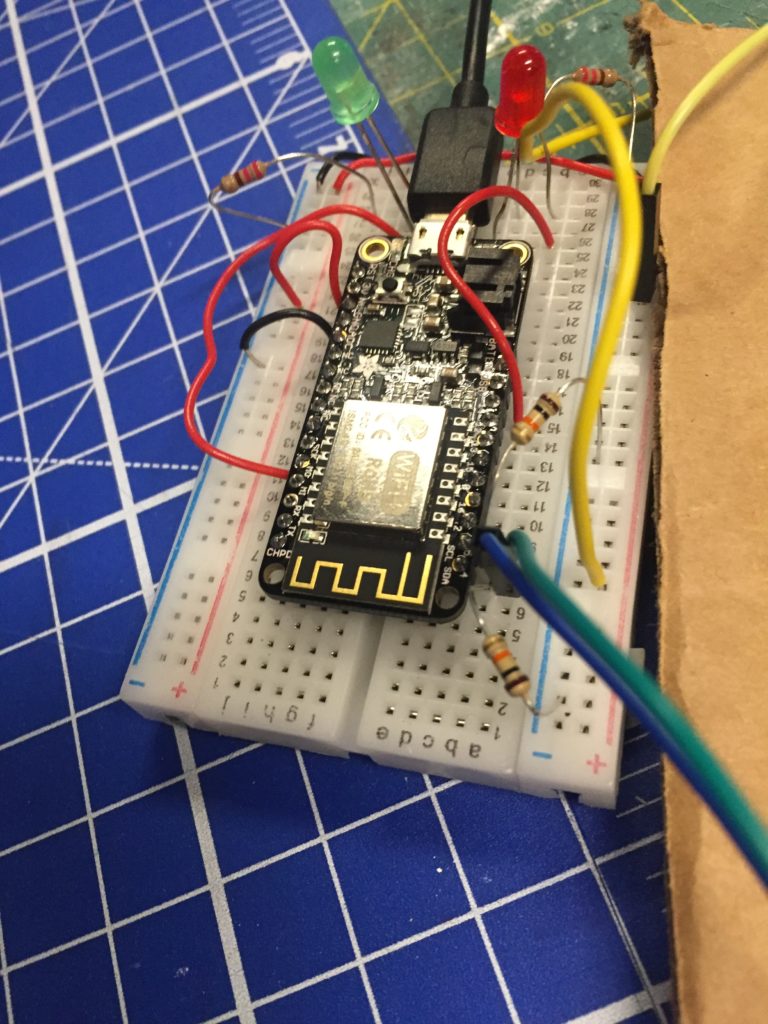
Feather HUZZAH ESP8266
220 ohm resistors x 2
10k ohm resistors x 2
tinfoil
cardboard
Process:
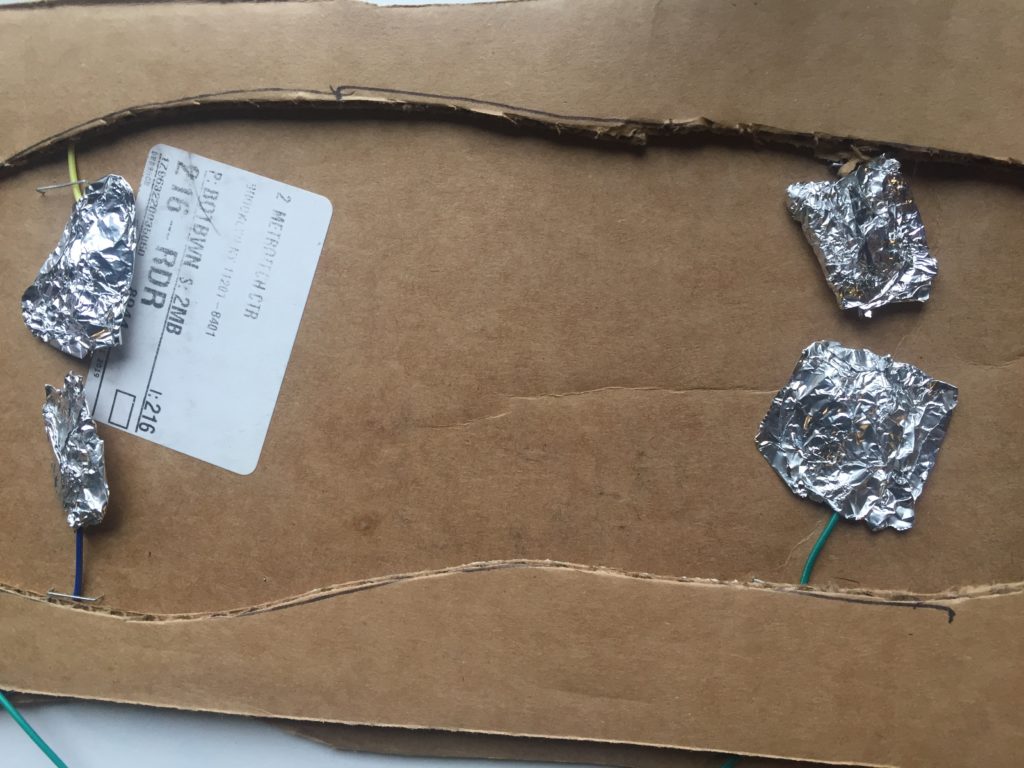
Because I already had the switch built all I really needed to do was complete the circuit. One problem was the wires I originally had coming from the foot switch were too short to reach one breadboard. To fix this I soldered extensions onto the original wires for a longer reach. I then plugged one side of the wires into power and the two wires from the other side into pins 4 and 5. I also made sure to connect these pins to ground via 10K ohm resistors in order to prevent floating values. All that was left was connect two LEDs to two other pins and then to ground with a resistor.
The only real problem I was having was getting the wires to connect with the bottom of the shoe. I believe when the shoe was going down it would push down on the plastic male-connector component of the wire making it hard to get a good connection between the wires and the piece of foil on the bottom of the shoe. To fix this I just wrapped the ends of these wires with tinfoil making sure that there would be a good connection. It then worked well.
Code:
The code was relatively straight forward for this. I just checked to see if one of the switches was reading HIGH, and if it was I turned on the corresponding LED, if it wasn’t I turned it off.
int ledG = 13;
int ledR = 14;
int footFront = 4;
int footBack = 5;
void setup() {
// put your setup code here, to run once:
pinMode(ledG, OUTPUT);
pinMode(ledR, OUTPUT);
pinMode(footFront, OUTPUT);
pinMode(footBack, OUTPUT);
}
void loop() {
// put your main code here, to run repeatedly:
if(digitalRead(footFront) == HIGH){ digitalWrite(ledG, HIGH);
}else{ digitalWrite(ledG, LOW);}
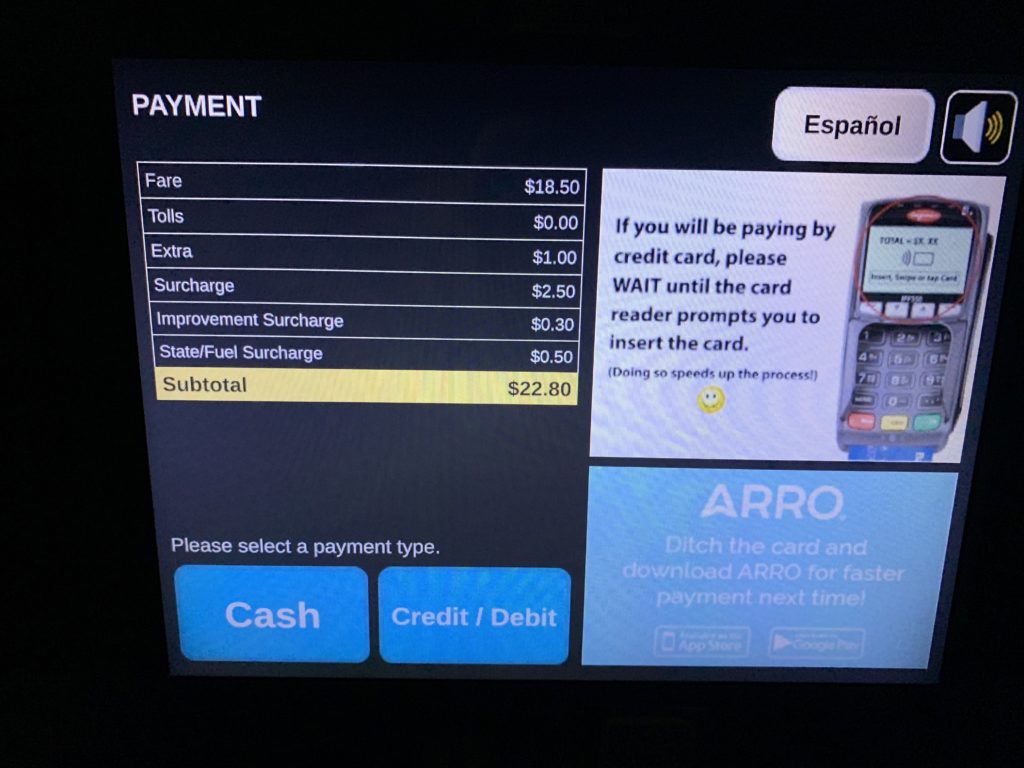
Yesterday I took a taxi with my friend, and I watched her interact with the advertising screen and payment machine. As soon as we get on the taxi, the screen automatically started to play some directions for accessibility. But my friend didn’t pay attention to it. While in the driving, she was bothered by the sound from the TV show and turned the voice down.
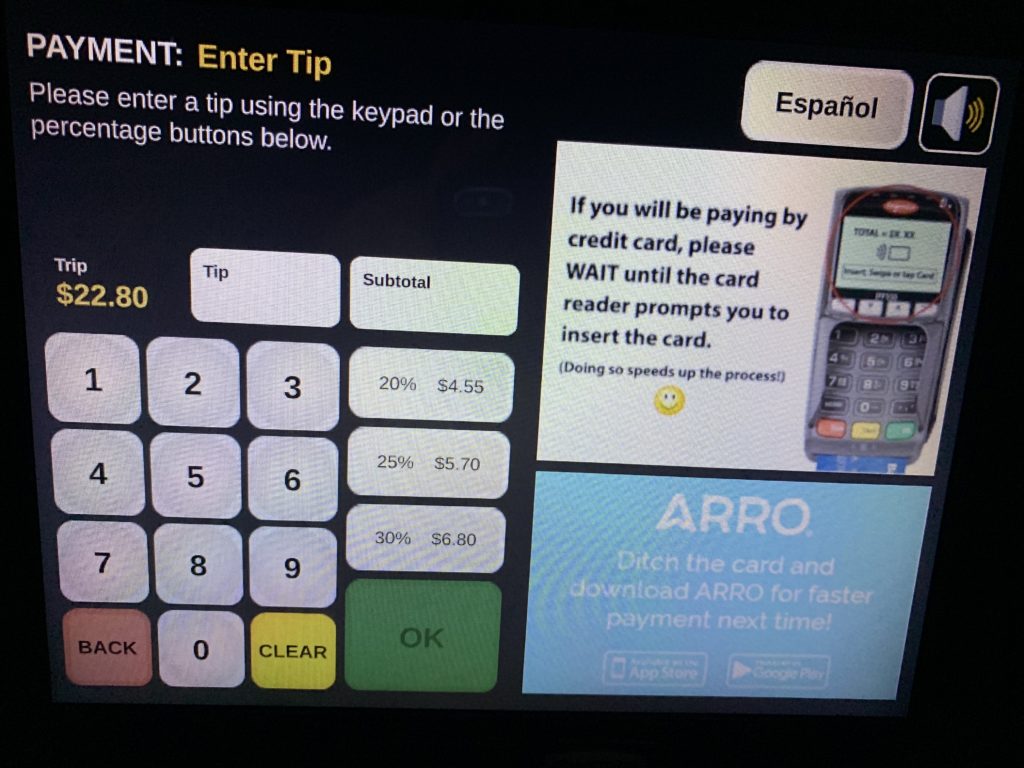
When we got to the destination and about to pay, the choice is showed on the screen “Cash” and “Credit/Debit”. There are two more buttons, one is to change to Spanish and the other is a picture of a speaker– I guess it can speak out the words and numbers on the screen as an accessibility feature, I don’t pretty sure because she didn’t tap on that. Then she chose “Credit/Debit”. This is not a hard choice since she only got 2 choices. Next screen is for the tips, after the selection of the number, she swiped the card. It is a machine that both support card with and without chip. But it is too dark in the taxi and it took her for a while to find the place to insert the card.
During the experience, I really like the accessibility design of it. When we first get into the car, it has a strong announcement that tell the passenger there is a accessibility system. So passengers in need won’t miss it. I would like to see more about it for the next time.
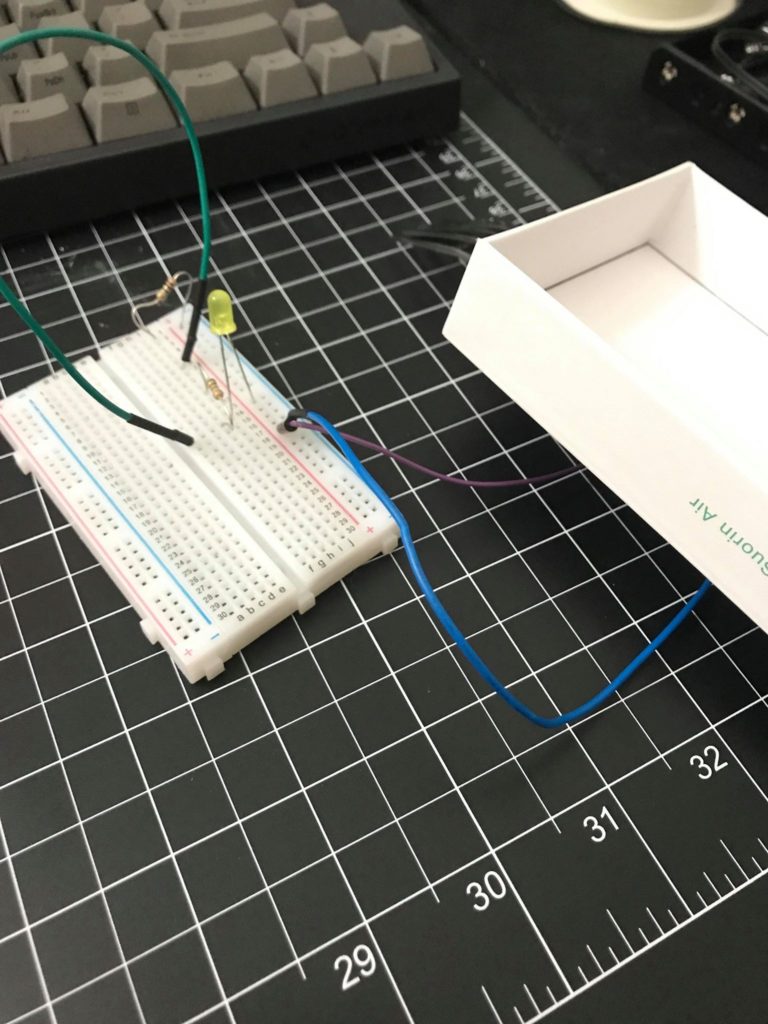
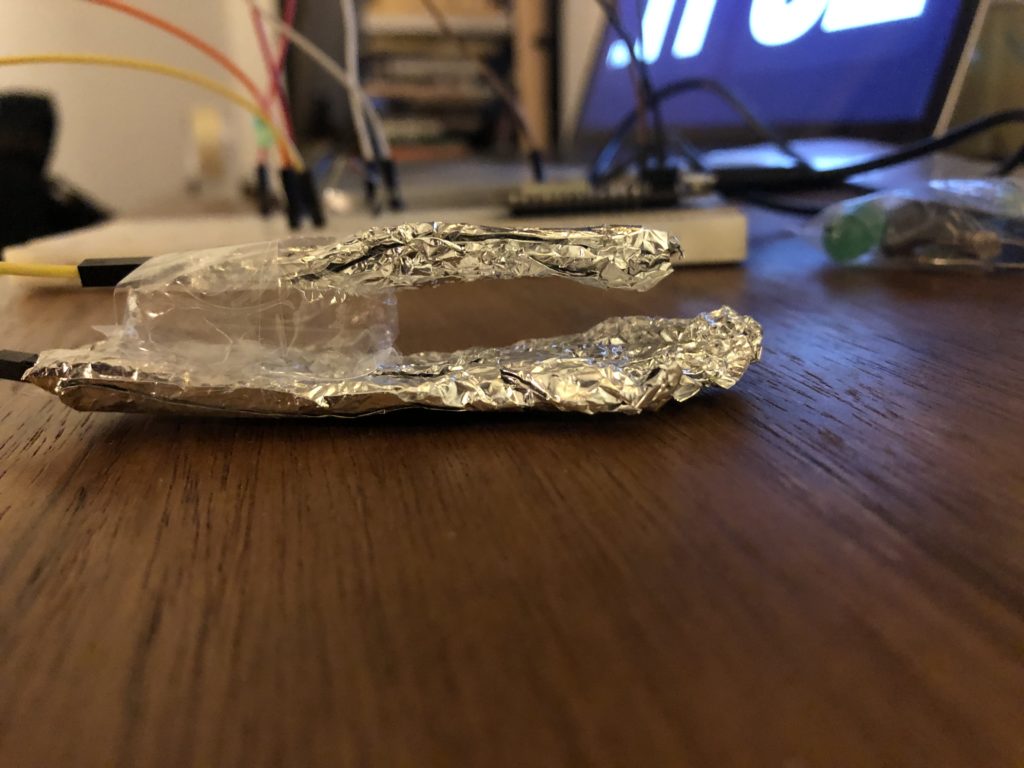
So I made some mistakes and decided to remake my hands free switch once again. I decided to make a foot pedal type of switch where the bottom of the foot pedal would have something conducive in order to make the circuit a closed circuit. And when the foot pedal was not being pressed, the circuit would be open which would inherently mean the switch would be off. I taped a metal fork to the backside of a good plastic insulator.
I based my switch on a guitar pedal. In order to close the circuit, you step on it, as with a guitar pedal. The inside of my switch has two pieces of aluminum foil separated by a thin piece of cardboard. When you step on the pedal, the two pieces of aluminum touch. Two wires from the circuit are connected to these foil pieces, and this completes the circuit. I also installed a push button.
The one interface that I tend to a lot is the vending machine. I see many people frequent the vending machine in between classes and I was observing them during my gaps. Don Norman talks about how affordances are defined by what actions are possible, he mentions that affordances became much more confusing with the addition of virtual objects. Due to the fact that the interfaces of vending machines have really changed in the past couple of years, from being simple interface of using simple inputs to having a complete digital interface. The affordances are the various combinations that could be pressed in order to obtain the specific item in the vending machines. The combination of the letters A-F and the numbers from 1-10. The various signifiers of the vending machines are the various buttons that are shown on the “screen” to show which buttons are which.
I realized that with the new interfaces of the vending machines it allows for a much more streamlined and seamless process to ordering something from the vending machine. I noticed that with the addition of use of credit cards, the process had become even more seamless. But I also realized that due to the touch screen that it had become an inconvenience due to the fact that the interface is not very efficient.
Yesterday, I observed my roommate Michael use a vending machine on the first floor of our dorm. Michael was trying to get a chocolate chip cookie from the bottom row of the vending machine. The vending machine has a touch screen display that gives step by step instructions. The machine tells you to swipe your card or insert money to begin. So Michael swiped his card, since he didn’t have any cash on him. The vending machine takes a couple of seconds to load after you swipe. The vending machine automatically takes $2.50 out of your card. Then it tells you to press the code of the snack you want. The vending machine has a small keyboard below the display. So Michael entered the code for the chocolate chip cookie. The cookie is supposed to then dispense. When you are finished with the transaction, the vending machine tells you to select another item, or press “complete” on the card reader (you don’t need to do this if you pay by cash). If the thing you bought was less than $2.50, pressing complete means that the vending machine changes the charge. If you don’t press complete, the vending machine asks you to buy another item, to use the rest of the $2.50. Once you press complete, the machine also tells you “Thank you, and have a great day.” Then after about 15 seconds, the display returns to its home screen. If you don’t press complete, after about 40 seconds the machine moves to the “Thank you, have a great day” screen, and then back to the home screen.
Unfortunately, the cookie didn’t dispense. There is a spiral shaped piece of metal that holds the food in place. The plastic casing of the cookie got stuck on this piece, and the cookie didn’t dispense. While this is disappointing, it is probably unavoidable. Since it would be impossible to design a frictionless vending machine, there is always a possibility that the food will not make it out the vending machine. However, It would be nice if the vending machine could have a sensor or device to determine if the food was dispensed and made it to the receptacle, and refund you if the food doesn’t dispense. Also, while this is more of a cosmetic improvement, it might be nice if the machine had a loading screen, since it takes a while to load after you swipe your card. Even though the machine clearly tells you to press complete on the card reader, a lot of people don’t do this. This means someone else could use the remainder of the $2.50 you paid. Perhaps the vending machine could have a big sign on it telling you to make sure to press complete. Or it could automatically take the whole $2.50 if you don’t press complete or select another item within 40 seconds. This would use negative reinforcement to get people to press complete.
When their food is stuck in the vending machine, many people will try to shake the vending machine to get it out. As far as I know, I don’t think this actually works. I suppose this would be an affordance of the vending machine: it is too heavy for an average person to pick up or move much. The touch screen display affords the user the ability to manipulate the machine through touch. The keyboard that you use to enter the code for the item you want affords you the ability to press letters and numbers. There is also a money scanner for dollar bills, and a coin slot. The money scanner affords you the ability to insert dollars, and the coin slots affords you the ability to insert coins. The messages from the machine are signifiers, with the exception of the last message that tells you to have a nice day.
As soon as I heard “hands-free”, for some reason my mind immediately went to nose. Perhaps it felt the most natural; the nose is kind of like a face thumb. Here is my switch in action: