Santarelli Final Project

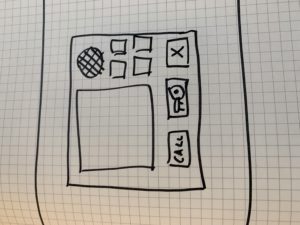
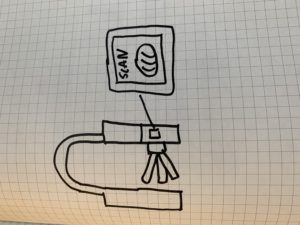
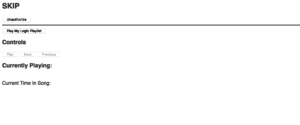
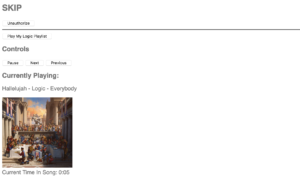
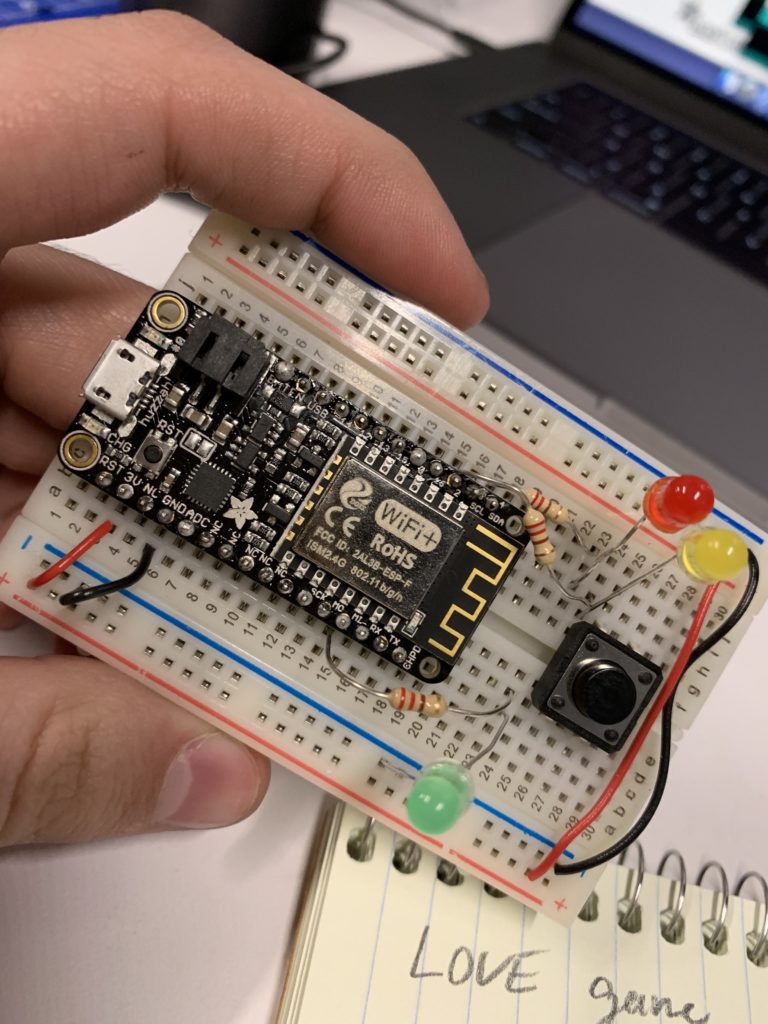
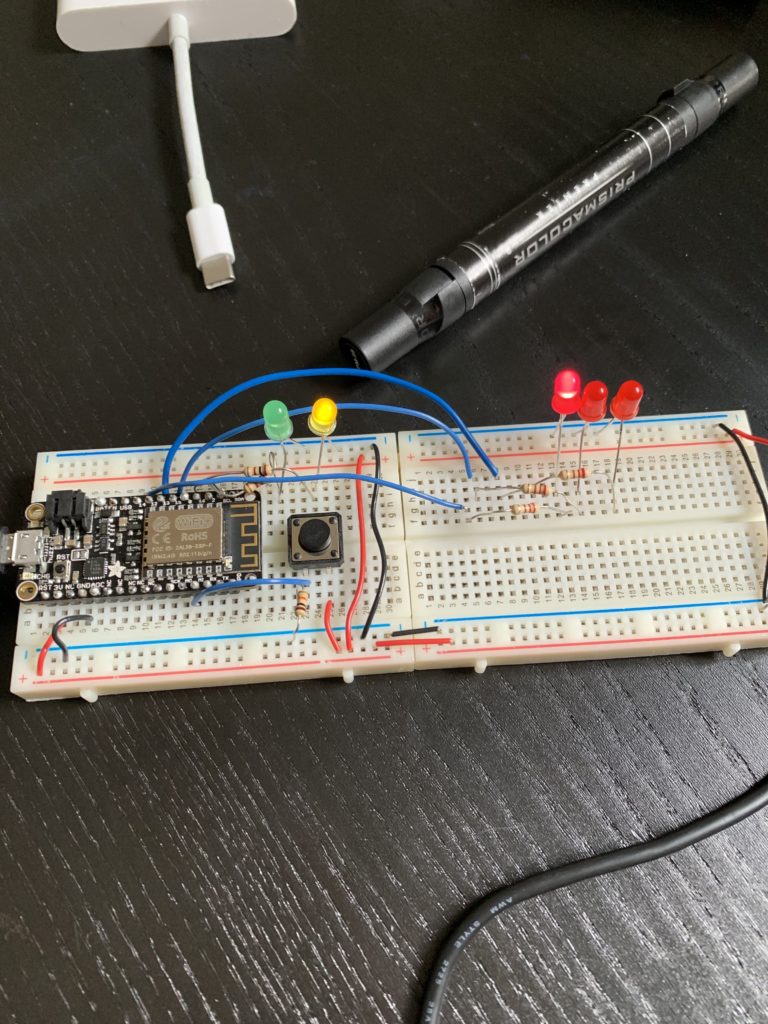
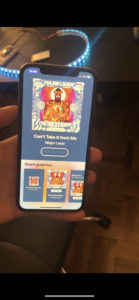
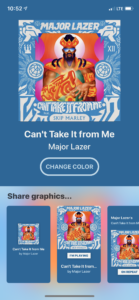
Here’s my final project. I hooked up the adafruit neopixel lights to my share music graphics app that’s on the App Store. https://itunes.apple.com/us/app/share-music-graphics/id1446148157?mt=8   

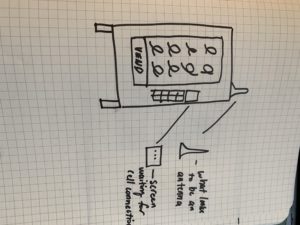
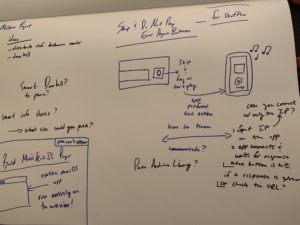
The app would ping the Apple Music API for their colors that they associate most with the album cover, and then sets the background color of the app. As soon as the background color is set, then the app sends a post request to Adafruit Data Broker service creating a string of the background color’s RGB and then the Arduino would take that string and then parse it, turn it into and integer and then set the RGB values accordingly. It was a little tricky getting the Arduino with the string to do these which is why I had to add X’s into the string when a value was missing because of how strings are char [] arrays on the Arduino board. 

Here’s the link to the code that I wrote: https://gist.github.com/Alexs2424/f9ac29a5af45a0bb8a99bea4a9c9179b 

Here’s the swift version: https://gist.github.com/Alexs2424/d583552f8664c0d82d6932fe1df918e0

Then if you hit the change color button on the app like it is on the ui, whatever the background color is, it changes to the light strip. I really liked this because this was really interesting to do more of an installation piece, where the Arduino does something in real time. I loved figuring it out and seeing how fast the data broker can be sometimes, it’s super fast for all the multitude of services, requests, that the device goes through, it’s pretty mind-boggling that everything can work that fast. 

It didn’t work in class because two of the wires were confused and switched around, which was completely my fault. And to learn to have the demo hooked up before you go on stage, and also when you get it to work to take. Video of it. 

Here’s the link to a video of all of it going on, in the app and the lights changing in real-time.

https://youtu.be/9jGVdbKXK_o 

Final Project Ideation

For my final project I thought it would be interesting to represent the music data that is dynamically posted through my app in something this WWDC app wall. The app wall was a live representation of the apps that were currently being downloaded in the world on the App Store, and would appear and flow down into this piece that you could look at.

The idea around this is that you could see in real time the apps and data that people were posting into an object. They were sorted by color and you could really understand certain trends that were happening through certain periods of the day.

My idea would be to take the data I get from music because I have the color, time of day the piece of music, and details about the piece of music was posted and where, it’d be interesting to build an installation piece that takes inspiration from the app wall. I’d want people to see and understand what music people currently are listening to. It’d take some tweaking and not be on this sort of scale but I think some way of representing data to people could be intriguing and show trends in the same way. You can learn and infer a lot of points about data when you see it in this format. 
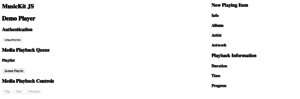
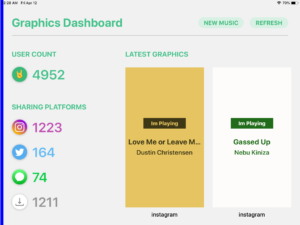
This is a screenshot of our dashboard with some of the real time statistics that we have now and might be incorporated in some form of the final project.

Email Subscriber Count

I thought it’d be neat if on my desk I’d have my arduino light up an LED every time we get a new subscriber on our startup website for our newsletter. I thought it’d be really cool to light up for a couple of seconds every time this happens. I used the mailchimp IFTTT widget and synced it up to main field on our website. There’s only a slight delay when the widget runs because the update can take up to an hour. Sign up on our website at http://noisehub.co.

Sketches

I found this in the Fulton St Subway station attached on an entrance terminal.

I believe it’s an NFC reader so that you’d be able to use the metro card right from your phone. I think it exists for ease of our use from our phones that we’re addicted to, so now instead of fumbling through our pocket to swipe and missing the swipe the first couple of times, you could just tap your phone and keep walking, the other reason is it’s one less thing that we’d waste. It’s digital so they’d be able to print a lot less metro cards so that’s great. 

This was a vending machine in one of the school buildings. On its keypad it had “waiting for cell connection” and that had tempted me to look into it more. I think I found a cell antenna on top of it that’s used for the payment connection. I was actually really surprised that it said cell connection and not connected to a local WiFi network. That may be because of the security concerns? I believe this exists so we can start moving to be cardess, as carrying cash isn’t as big of a thing as it used to be. I think there’d be better less wasteful ways to achieve this and I’m not convinced we actually need it.

The last one I found was in my friends apartment it was their keypad to ring me up. It sent a live video feed of me up and then they could let me into the apartment without coming down. I thought this was interesting internet connected device because most apartments don’t have that. It exists to make us even more lazy to let the food delivery person in or our friends. 

Midterm Project – Santarelli

From last week I learned that I needed to use a CDN in order to get the webpage to load properly on my computer’s browser, so I started with getting that to work. I was surprised to learn that apple already has a CDN for Apple Music so I started implementing that into my website. https://js-cdn.music.apple.com/musickit/v1/musickit.js You can use the JS api through this version and made things a lot easier because I could then reference those from declarative mark up elements where all the hard work was already completed for us. The markup elements do some of the tricky parts especially with interacting with the microcontroller in a webpage setting because it already starts to look like some sort of player but more barebones. This demo player was good but it had more information than was really needed and could’ve been clearer to the user on what it should be.

From here I refined it from just picking a random apple playlist to one of mine and getting it to correctly work. I found the playlist identifiers and chose a specific one to try out with this player. I styled it and added other pieces, and just as importantly removed things that weren’t as important to 1. keep it a lightweight player, and 2. not distract you from the point in the first place which is, it’s suppose to be in the background.

This is what it turned out to be. I had issues getting the authorization through apple’s services to work on the microcontroller because if I set the controller to refresh, it would immediately unauthorize, drop the queue of the songs and start again. Even if you started playing after awhile. So then I started looking into keep-alive connections because the microcontroller was purposely dropping a connection after 5 seconds even after I didn’t tell the client to close. It became harder and harder to get the microcontroller to register the button clicks to skip because it would do it only after the connection was dropped. I looked into other web libraries for the esp8266 on github but after trying it out and looking with the other issues people had, the controller always overrode and closed the connection after a couple of seconds. I really want to be able to build this the proper way and get it working but in order to do so I have to do it somewhere else. However I was very proud that I was able to get a player to properly play my personal playlist from apple music and host it on the microcontroller.

Midterm Project (Update 1)

So, there are two things about my midterm project. First the product that I ended up with isn’t as great and wasn’t what I pictured to be making. It was a result of the web architecture that I couldn’t do what I was trying to do, in the ways that I tried and wanted.

I wanted to make a skip & never play button for Apple Music. When playing music from my phone, I’d press the button, it’d skip what’s playing and then flag it so it wouldn’t play in my background music playlist. I’ve already worked with the apple music api so that wasn’t the main trouble. How the board serves up the websites, can’t serve up all the JS needed (at least not properly enough to run it on my machine) as it was a lot. Because the JS route didn’t work, I have a database for another app that’s setup with Parse Platform’s APIs. They had an Arduino SDK and I hooked up to send a request to the server and in the iOS app whenever there was a new object created, I was going to have it skip and flag the song. Sadly I couldn’t complete this because the Parse Arduino SDK doesn’t support the ESP8266 architecture out of the box, I was trying to modify but couldn’t really get anywhere because I need a more developed understanding of web requests and what goes into them.  

https://developer.apple.com/documentation/musickitjs 

https://github.com/parse-community/parse-embedded-sdks 

https://github.com/parse-community/parse-embedded-sdks/issues/5 

https://github.com/jcard0na/parse-sdk-for-esp8266 

What I ended up making was a “doorbell” that’s connected and tells you when someone’s at the door and presses the button. I wanted it to work and got the JS to ring but didn’t know how/where to host the mp3 file so that the JS audio player could actually play the sound when someone played the song. 

Web Setup with Arduino is not my strong suit in programming because the requests don’t follow the same pattern of events that I’m used to, and if you know a bit more and are able to take a look at the web player and finding another way to host the file with a lot of JS I’d really appreciate it and could get it to work. 

If this continues as a doorbell, I want to add other peripherals, possibly a camera, but other features such as an audible trigger so that you have that kind of feedback along with a nicer clearer way with the electronics hidden to interface with the button. A picture would be sent of the person so that you could see who’s at the door, to add more context if it’s just someone dropping off a package or actually there to visit you. 

Homework #4

I had the idea to create something that could tell based upon the amount of natural light by sitting at a window, could then change other IOT devices in your room based upon that. What I was able to complete was based off of the sensor values on the photocell, could tell which were most like, night, afternoon, evening, and morning. As the day starts it’s really bright and big and as the day goes on the font and color gets darker and smaller.

Not really something that would be sold, but I thought it’d be cool to interact with a couple of IOT Api’s to see if I could “dim” or turn my lights off (if that’s possible without having expensive lights) based on the natural light hitting the sensor by my window. (It’s not perfect with the amount of light but I think it’s somewhat approximate when you hold it to the window.)


Homework 3 Love Test Machine

For my love test machine I decided to go with more of a classic interface. Those old machines usually take an input and don’t tell you how you did until the whole game is finished. My idea was to take a button, you press it once to start the game, once the game is started then you start tapping the button furiously as possible to see how many times you can get it to go. 

With the readings from last week, I understand that you have to make it clear to the person what they’re doing and where they’re at in the game. They also need a feedback mechanism so they know what’s going on. I used the lights on the left hand side of the board for that purpose. Yellow for when the game is about to start, Green for when the user should tapping as hard as possible, and the three red leds on the right hand side of the board indicate the results and how you did. 

Because I was at first struggling with understanding, I started with writing the code for the leds, in order to sequence them in the way I wanted them to. Once I was able to do that then I added in the switch and once I turned the switch into an on and off sequence that’s when it really started to come together. I then organized the components onto another side of the board in order to make sure that it was understandable and doable. 

The one issue I have is in the middle when you’re tapping the button delay doesn’t work but I was wondering how I should go about letting the person tap as many times as possible before going onto the next step for like 5 seconds. 

*my phone images can’t be uploaded because of HEIC

Observation Homework

I was waiting in line at McDonald’s for a coke. The McDonald’s in Union Square has kiosks to order off of, because they don’t always have cashiers to make the transactions. The person in front of me (and I when it was my turn) had trouble ordering off of the kiosk.

The most frustrating thing about the kiosk is, there’s absolutely no affordances when you tap something. Normally when you have an interface or an object you know it’s being tapped because it highlights the portion that has been tapped or has a loading indicator. The person was trying to order some McNuggets but when they tapped on the menu item nothing had occurred. This quickly led to the person trying all sorts of different ways of jabbing their finger into the screen as hard as they could. The lack of knowing what the kiosk is doing here is the real problem because we expect when we touch something, it reacts to us. After the kiosk had finally picked up the person’s tap, it didn’t choose the right menu item. That process was started again when they were trying to hit the cancel button and go back.

When you usually go through interacting with a touchscreen or an object, we need to know that the object has taken, accepted our input and is doing something with it. It had no signifiers and when it actually did they were delayed. When they went to pay at the kiosk, there was nothing telling the person to use the terminal to pay with their card. Just “pay here” was posted with all of the payment options. I thought it was particularly interesting because this is supposed to take less time than a cashier and yet I couldn’t help but think I might’ve already ordered by the time this actually finished. My ideas to improve the kiosk would make it more responsive and if it’s not recognizing a tap on a button at least put a dot to indicate where the person tapped, so they can tap more precisely if that’s the issue. People need to know what the kiosk is doing when they’re trying to order their food.

Hands Free Switch

I started by envisioning some problems you’d run into if you didn’t have use of your arms. The thought of opening a door I believe would be a big hindrance and something that’d be really difficult. I wanted to make a better version of the handicap switches we normally put on the doors for people to open.

I designed it to have a longer area to be tapped in and the connection would be made at the bottom signifying something hitting all the way. This could be easily achieved by simply pressing any force into the top triggering a response when the circuit is completed to open the door. It would be something you could keep at foot level because I think that would prove to be a lot more useful and accessible. If you’re in a chair it can tap into it, if you don’t have full use of your arms you can use your leg to press the switch open, and even if you have your hands full.